Thanks for joining us today here at Fresh's Workshop. If you are a first-time visitor, WELCOME. If you have been here before, THANKS for coming back.
This is the spot where we build and repair all kinds of cool stuff, along with making a ton of saw dust. (Man Glitter.)
Last time in the Workshop, we repaired a TV tray for my friend Wallace.
TV TRAY REPAIR (Click on the link to see that episode)
That was a year or so ago. (Time passes differently on the internet)
And now, he is back with another table that bit the big one.
It needs to be "Freshy-fied."
Before we begin:
Be sure to read, understand and follow all of the safety rules that come with your power tools. Knowing how to use your power tools properly will greatly reduce the risk of personal injury. And remember this, there is no greater safety rule than to wear safety glasses.
So, let's get into this table.
You can see by the upside-down photos below; the legs broke at the same place on both sides of the frame.
Did they not think to glue this piece??? Those tiny staples won't hold up. This is the "weakest link."
Measuring the depth of the cut.
And the angles of the dangle.
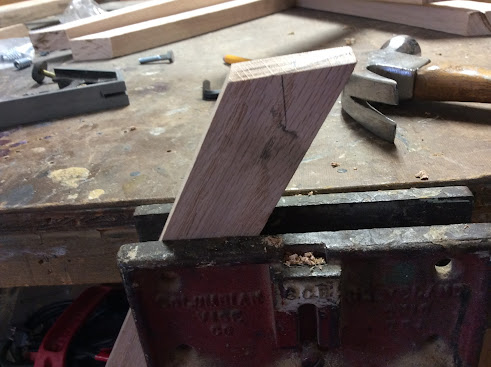
Wallace brought a couple of oak boards that were already milled to the right width and depth. All I had to do was cut them to length and then make the angle cuts.
Not a bad fit.
Below are the other frame parts. The three on the right, came from the original, and were sanded down for repainting.
Now I am going to make another set of parts, this time from hard maple. I may use those for a second table for Penny and me.
Using the chop saw to cut some angles on the board that attaches to the top.At the jointer
Cutting the maple down to size
In order to get the correct angle, I drilled a center hole at the pivot point, then extended the lower portion to the correct length. Then I marked the correct angles.
These are the parts for the prototype table I am making for myself.
Made from Maple, the plan is to sand well, then varnish to a natural finish. As you can see, I have already glued the first side.
Wallace wants his version painted black. And I will be making his version from OAK. So, let's turn our attention to his table
I drilled a hole in the center of each Leg piece, then bolted them together. I then "opened" up the legs to get an 18-inch measurement across the top and the bottom. Then I tightened the bolt.
I placed it on my table saw and adjusted the miter for the correct angle. I then used a pencil and drew the angles on each board. At that point I raised the saw blade to the proper height and started to nibble away the piece.
I placed it on my table saw and adjusted the miter for the correct angle. I then used a pencil and drew the angles on each board. At that point I raised the saw blade to the proper height and started to nibble away the piece.
Here I am cutting the Top and Bottom Angles.
And "Dialing In" the Cross Grooves
Do not file your finger!!!! (I should have read the disclaimer at the beginning)
Using some glue, I put the cross pieces together. A clamp and sacrificial boards will keep it together until the clue dries.
And here they are, glued and clamped together.
And "Dialing In" the Cross Grooves
Do not file your finger!!!! (I should have read the disclaimer at the beginning)
Using some glue, I put the cross pieces together. A clamp and sacrificial boards will keep it together until the clue dries.
And here they are, glued and clamped together.
While the glue dries, I think I will start some workshop cleaning, It's a mess.
So now everything is glued up and dried. (AND the workshop is a bit cleaner)
I think I need to see the top. I will have Wallace bring it down to the shop.
I am glad he brought it down. It is a bit different than I expected.
BUT
Everything seems to fit, so now let's get some bolt inserts installed.
A bolt insert is like a nut on the inside, with threads on the outside. You drill a proper size hole in the wood, then using an Allen Wrench, you screw the insert into the wood. Then thread a bolt into the insert.
I have some 1/4 20 bolt inserts, but his table is metric. Since I have all of the old hardware, I will see if I can remove the metric inserts from the broken leg.
Success..... they came right out of the old leg. (Make sure you use the proper size Allen wrench. In this case, we used a METRIC wrench, since this table was made in Indonesia.)
Let's do a test fit in a piece of scrap wood.
Not bad. if I do say so myself.
Now we can round off the legs, and sand, sand, sand.
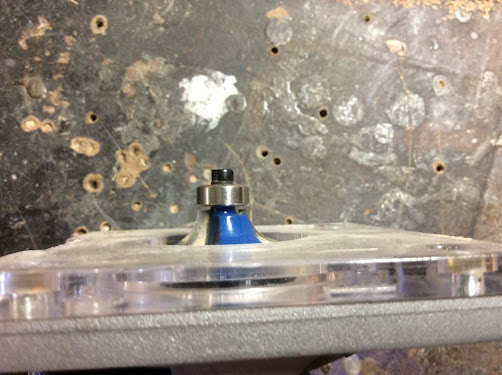
To round off the legs, I used my trim router along with a round over bit.
Now we can put the legs together. (Time for a new bench top)
Let's paint this sucker.
(I always paint outside. MAKE sure that you check the wind direction and move the cars if necessary.)
I used some black paint I had in the shop, and it really made the Oak grain look good. I may have to rethink my feelings towards painted furniture. It came out nice.
Now it is time for some top assembly.
And Bob's Your Uncle.
Nice, isn't it?
Wallace picked up his table and was thrilled with the results.
I was so happy to help out a friend. My only concern is that each time he shows up at my shop's door, the table gets BIGGER!
And the Maple legs I made for myself? Watch this space as I have a cool idea. It's something I have always wanted to make.
Hope you come back. We have a ton of pending projects.
Now I can have a refreshing Adult Beverage.
Be sure to visit some of my other blogs:
AROUND THE KITCHEN - SEE WHAT I COOK
BRIARWOOD - YOU CAN READ MY NOVELS
AUDIO CONSOLE - WHERE I AM BUILDING AN AUDIO MIXER
DISCLAIMER The information contained here is for ENTERTAINMENT purposes only. Working with woodworking tools can be dangerous. The user of these tools should have a basic knowledge of woodworking and be familiar with the proper use and safety precautions associated with these tools. Always wear appropriate personal protective equipment, such as safety glasses, ear protection, and a dust mask. Always use the tool in accordance with the manufacturer's instructions and guidelines. Always maintain a safe and organized work area.


No comments:
Post a Comment